
How To Use Mini Microphone On Iphone?
Using a mini microphone with an iPhone can significantly enhance the audio quality of your recordings, whether you're creating content for social media, conducting interviews, or recording music. This article will guide you through the process of connecting and using a mini microphone with your iPhone, addressing common issues and providing practical tips to ensure you get the best possible audio quality.
Understanding the Basics
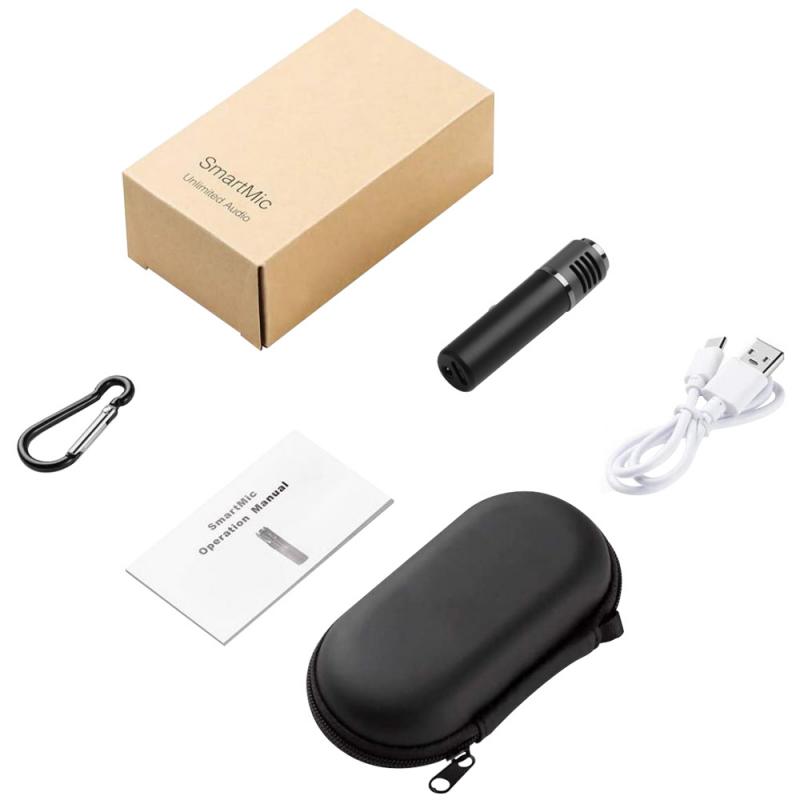
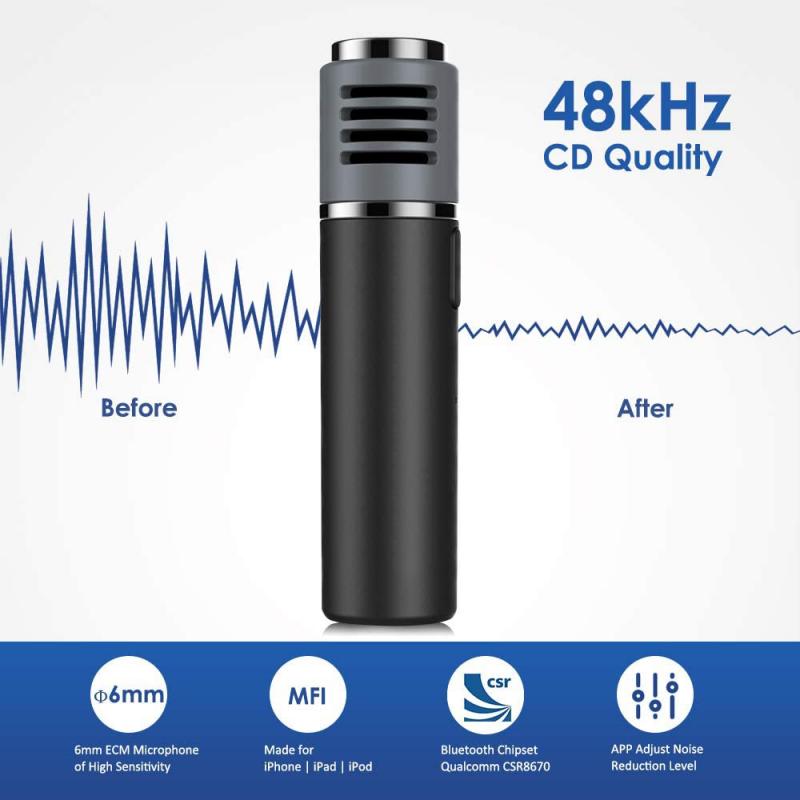
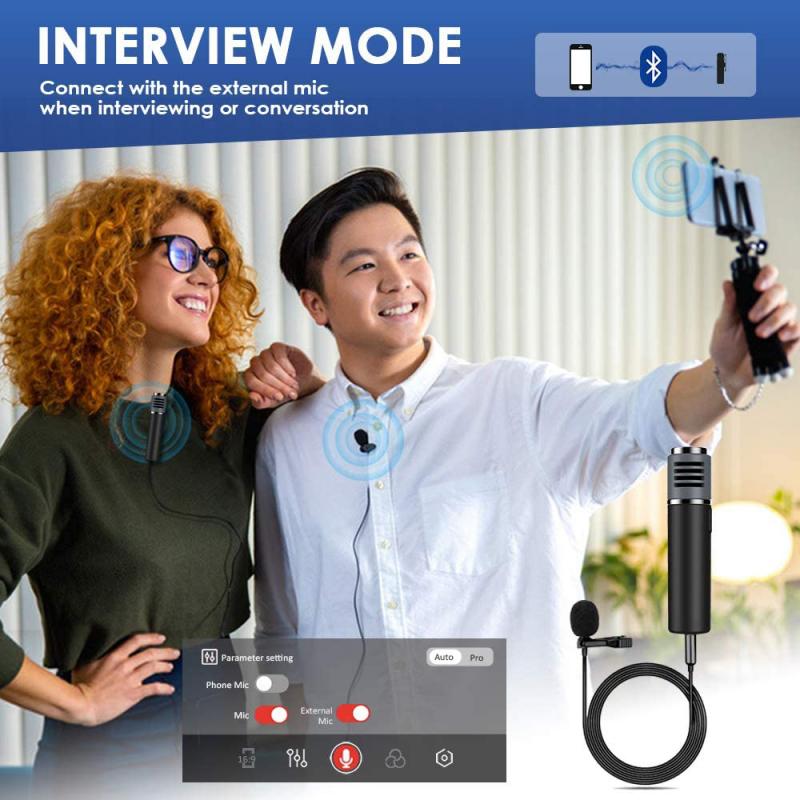
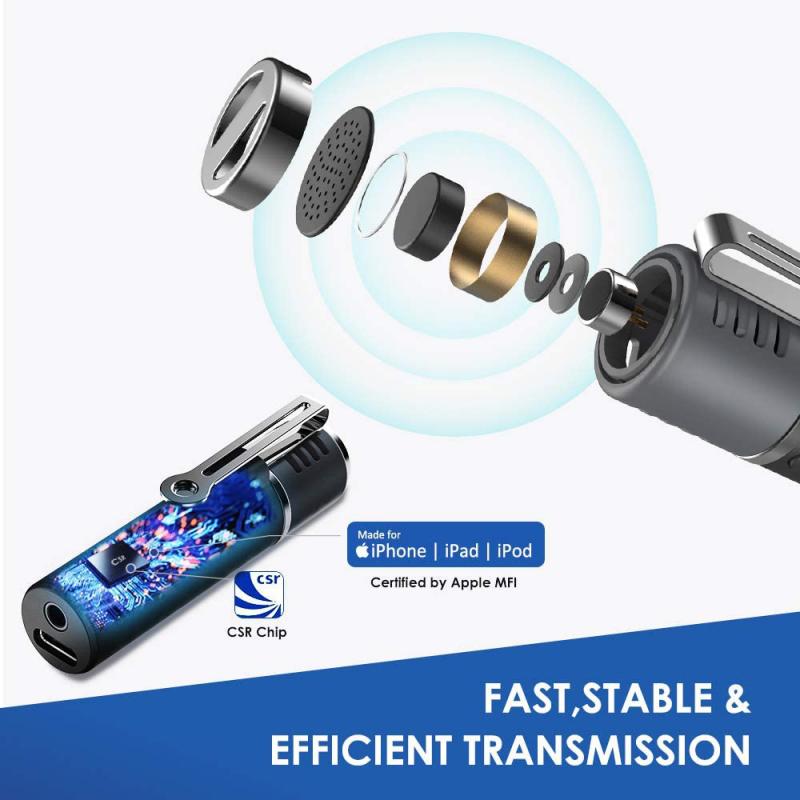
Before diving into the specifics, it's important to understand the types of mini microphones available and their compatibility with iPhones. Mini microphones come in various forms, including lavalier (clip-on) mics, shotgun mics, and handheld mics. Most modern mini microphones connect to iPhones via the Lightning port, but some may use the 3.5mm headphone jack, which requires an adapter for newer iPhone models.
Step-by-Step Guide to Using a Mini Microphone with an iPhone
1. Check Compatibility
First, ensure that your mini microphone is compatible with your iPhone model. If your microphone uses a 3.5mm jack and your iPhone lacks a headphone jack, you'll need a Lightning to 3.5mm adapter. For microphones with a Lightning connector, compatibility is generally straightforward.
2. Gather Necessary Accessories
Depending on your microphone type, you may need additional accessories:
- Adapters: As mentioned, a Lightning to 3.5mm adapter may be necessary.
- Extension Cables: If you need more mobility, an extension cable can be useful.
- Mounts and Clips: For lavalier mics, ensure you have a clip to attach the mic to your clothing.
3. Connect the Microphone
- For Lightning Microphones: Simply plug the microphone into the Lightning port of your iPhone.
- For 3.5mm Microphones: Connect the microphone to the Lightning to 3.5mm adapter, then plug the adapter into the Lightning port.
4. Adjust Settings
Once connected, your iPhone should automatically recognize the external microphone. However, you may need to adjust some settings:
- Open the Camera or Voice Memos app: These apps typically use the external microphone by default.
- Check Audio Input: In some third-party recording apps, you may need to select the external microphone as the audio input source.
5. Test the Microphone
Before starting your recording, test the microphone to ensure it's working correctly:
- Record a Short Clip: Use the Voice Memos app or the Camera app to record a short audio or video clip.
- Playback the Recording: Listen to the recording to check the audio quality and ensure the microphone is functioning properly.
Troubleshooting Common Issues
Even with the best preparation, you may encounter some issues when using a mini microphone with your iPhone. Here are some common problems and their solutions:
1. Microphone Not Recognized
If your iPhone doesn't recognize the microphone:
- Check Connections: Ensure the microphone is securely connected to the iPhone.
- Restart Your iPhone: Sometimes, a simple restart can resolve recognition issues.
- Update iOS: Make sure your iPhone is running the latest version of iOS, as updates can fix compatibility issues.
2. Poor Audio Quality
If the audio quality is poor:
- Check the Microphone Placement: Ensure the microphone is positioned correctly and not obstructed.
- Reduce Background Noise: Record in a quiet environment to minimize background noise.
- Use a Windscreen: For outdoor recordings, use a windscreen to reduce wind noise.
3. Interference or Static
If you hear interference or static:
- Check for Interference Sources: Move away from electronic devices that may cause interference.
- Use Shielded Cables: If using extension cables, ensure they are shielded to reduce interference.
Tips for Optimal Audio Quality
To achieve the best audio quality when using a mini microphone with your iPhone, consider the following tips:
1. Use High-Quality Microphones
Invest in a high-quality mini microphone from reputable brands. While they may be more expensive, the improvement in audio quality is often worth the investment.
2. Monitor Audio Levels
Use apps that allow you to monitor audio levels in real-time. This helps ensure your recordings are not too quiet or too loud, preventing distortion.
3. Record in Controlled Environments
Whenever possible, record in environments with minimal background noise. If recording outdoors, choose locations with less wind and ambient noise.
4. Use Audio Editing Software
Post-production can significantly enhance your recordings. Use audio editing software to clean up recordings, remove background noise, and adjust levels.
Recommended Apps for Recording
Several apps can enhance your recording experience with a mini microphone on your iPhone:
1. GarageBand
GarageBand is a powerful app for recording and editing audio. It offers a range of tools for musicians and podcasters, including real-time monitoring and multi-track recording.
2. Voice Memos
For simple voice recordings, the built-in Voice Memos app is easy to use and integrates seamlessly with iOS.
3. FiLMiC Pro
For video recordings, FiLMiC Pro offers advanced audio controls, including the ability to select external microphones and monitor audio levels.
Using a mini microphone with your iPhone can greatly enhance the quality of your audio recordings. By following the steps outlined in this guide, you can ensure a smooth setup process and troubleshoot common issues effectively. Remember to invest in high-quality equipment, monitor your audio levels, and use appropriate recording environments to achieve the best results. With the right tools and techniques, you'll be able to produce professional-quality audio content directly from your iPhone.
There are no comments for this blog.