
How Do I Install Security Cameras?
Installing security cameras is a crucial step in enhancing the security of your home or business. With the rise in crime rates and the need for constant surveillance, many people are turning to security cameras to keep an eye on their properties. However, the process of installing these cameras can be daunting for those who are not technically inclined. This article aims to provide a comprehensive guide on how to install security cameras, covering everything from choosing the right type of camera to the actual installation process.
Choosing the Right Security Camera
Before you start the installation process, it's essential to choose the right type of security camera for your needs. There are several types of security cameras available, each with its own set of features and benefits.
1. Wired Cameras: These cameras are connected to a recording device and power source via cables. They offer high-quality video and are less susceptible to interference but can be challenging to install due to the wiring involved.
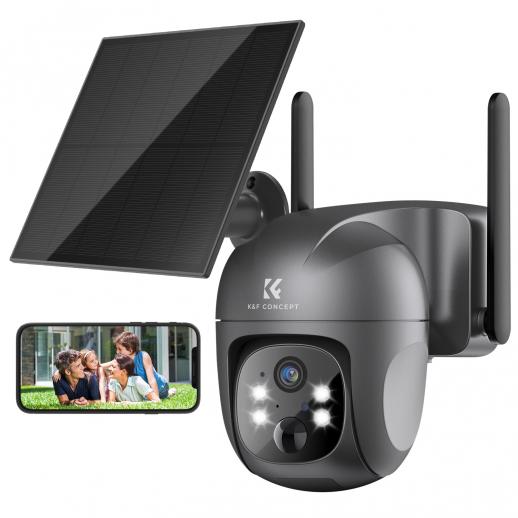
2. Wireless Cameras: These cameras transmit video signals wirelessly to a receiver. They are easier to install but may suffer from signal interference and require a stable Wi-Fi connection.
3. Indoor Cameras: Designed for indoor use, these cameras are typically smaller and less weather-resistant than outdoor cameras.
4. Outdoor Cameras: Built to withstand the elements, these cameras are more durable and often come with features like night vision and motion detection.
5. PTZ Cameras: Pan-Tilt-Zoom cameras can be remotely controlled to pan left and right, tilt up and down, and zoom in and out. They offer a broader range of coverage but are generally more expensive.
Planning Your Camera Placement
Proper camera placement is crucial for effective surveillance. Here are some tips to help you plan:
1. Entry Points: Place cameras at all entry points, including front and back doors, windows, and garage doors. These are the most common points of entry for intruders.
2. High Traffic Areas: Install cameras in high-traffic areas like living rooms, hallways, and staircases to monitor movement within the property.
3. Outdoor Coverage: Ensure that outdoor cameras cover the perimeter of your property, including driveways, yards, and any other vulnerable areas.
4. Height and Angle: Mount cameras at a height of 8-10 feet to avoid tampering and ensure a wide field of view. Angle the cameras downward to capture faces and other identifying features.
Gathering the Necessary Tools and Equipment
Before you begin the installation, gather all the necessary tools and equipment. Here's a list of what you might need:
1. Security Cameras: Ensure you have the right type and number of cameras for your needs.
2. DVR/NVR: A Digital Video Recorder (DVR) or Network Video Recorder (NVR) to store the footage.
3. Cables: For wired cameras, you'll need coaxial or Ethernet cables.
4. Power Supply: Ensure you have a reliable power source for your cameras.
5. Mounting Brackets: These are usually included with the cameras.
6. Drill and Drill Bits: For mounting the cameras.
7. Screws and Anchors: To secure the cameras in place.
8. Monitor: To view the camera feed during installation.
9. Smartphone/Tablet: For configuring wireless cameras.
Step-by-Step Installation Guide
Step 1: Mounting the Cameras
1. Mark the Spots: Use a pencil to mark the spots where you want to mount the cameras.
2. Drill Holes: Drill holes at the marked spots for the mounting brackets.
3. Attach the Brackets: Secure the mounting brackets to the wall using screws and anchors.
4. Mount the Cameras: Attach the cameras to the mounting brackets and adjust the angle as needed.
Step 2: Running the Cables (For Wired Cameras)
1. Plan the Route: Plan the route for the cables from the cameras to the DVR/NVR.
2. Drill Holes: Drill holes through walls or ceilings to run the cables.
3. Run the Cables: Run the cables from the cameras to the DVR/NVR, ensuring they are hidden and protected.
4. Connect the Cables: Connect the cables to the cameras and the DVR/NVR.
Step 3: Powering the Cameras
1. Plug in the Power Supply: Connect the cameras to a power source. For wired cameras, this may involve plugging them into an outlet or using a power adapter.
2. Check the Connections: Ensure all connections are secure and the cameras are receiving power.
Step 4: Configuring the System
1. Connect to a Monitor: Connect the DVR/NVR to a monitor to view the camera feed.
2. Configure the Settings: Use the DVR/NVR interface to configure the camera settings, including motion detection, recording schedules, and alerts.
3. Test the Cameras: Test each camera to ensure it is capturing the desired area and the video quality is satisfactory.
Step 5: Setting Up Remote Access
1. Install the App: Download and install the manufacturer's app on your smartphone or tablet.
2. Connect to the System: Follow the app's instructions to connect to your DVR/NVR.
3. Configure Remote Access: Set up remote access to view the camera feed from anywhere.
Tips for Optimal Performance
1. Regular Maintenance: Clean the camera lenses regularly and check for any obstructions.
2. Firmware Updates: Keep the camera firmware up to date to ensure optimal performance and security.
3. Backup Footage: Regularly back up your footage to an external hard drive or cloud storage.
4. Secure the System: Use strong passwords and enable encryption to protect your system from unauthorized access.
Troubleshooting Common Issues
1. No Video Feed: Check the power supply and cable connections. Ensure the camera is properly connected to the DVR/NVR.
2. Poor Video Quality: Adjust the camera angle and focus. Clean the lens and check for any obstructions.
3. Interference: For wireless cameras, ensure they are within range of the Wi-Fi signal and there are no obstacles causing interference.
4. Remote Access Issues: Ensure the DVR/NVR is connected to the internet and the app is correctly configured.
Installing security cameras can significantly enhance the security of your property, providing peace of mind and deterring potential intruders. By following this comprehensive guide, you can successfully install and configure your security camera system, ensuring optimal performance and reliability. Whether you choose wired or wireless cameras, proper planning, and installation are key to achieving the best results. Regular maintenance and troubleshooting will help keep your system running smoothly, providing continuous surveillance and protection for your home or business.
There are no comments for this blog.