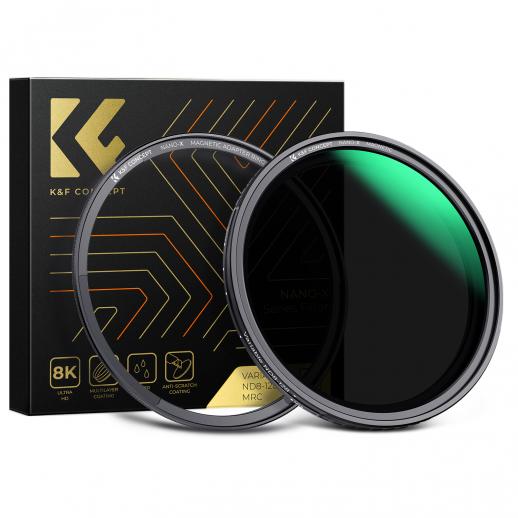
How To Use An Nd Filter?
Neutral Density (ND) filters are essential tools in a photographer's kit, allowing for greater control over exposure and creative effects. These filters reduce the amount of light entering the camera lens without affecting the color of the image. This capability is particularly useful in various scenarios, such as achieving motion blur in bright conditions or using a wide aperture in strong sunlight. In this article, we will delve into the practical applications of ND filters, how to choose the right one, and tips for using them effectively.

Understanding ND Filters
ND filters come in different strengths, measured in stops, which indicate how much light they block. Common strengths include ND2 (1 stop), ND4 (2 stops), ND8 (3 stops), and so on. The higher the number, the more light the filter blocks. For instance, an ND8 filter reduces the light by three stops, allowing only 12.5% of the light to pass through.
Why Use an ND Filter?
1. Controlling Exposure in Bright Light: One of the primary uses of ND filters is to control exposure in bright light conditions. For example, when shooting landscapes on a sunny day, an ND filter can help prevent overexposure, allowing you to capture details in both the highlights and shadows.
2. Achieving Motion Blur: ND filters are indispensable for creating motion blur effects. By reducing the light entering the lens, you can use slower shutter speeds even in daylight. This technique is often used to capture the smooth flow of water in rivers or waterfalls, or to blur the movement of clouds in the sky.
3. Using Wide Apertures: Photographers often want to use wide apertures to achieve a shallow depth of field, which isolates the subject from the background. In bright conditions, this can lead to overexposure. An ND filter allows you to use a wide aperture without overexposing the image.
4. Video Recording: In videography, maintaining a consistent shutter speed is crucial for achieving a natural motion blur. ND filters help videographers adhere to the 180-degree shutter rule (shutter speed is double the frame rate) even in bright conditions.
Choosing the Right ND Filter
When selecting an ND filter, consider the following factors:
1. Strength: Determine the amount of light reduction you need. For general use, an ND8 or ND16 filter is often sufficient. For more extreme conditions, such as shooting long exposures in daylight, you might need an ND64 or ND1000 filter.
2. Quality: Invest in high-quality ND filters to avoid issues like color cast, vignetting, or loss of sharpness. Reputable brands like B+W, Hoya, and Lee Filters are known for their quality.
3. Type: ND filters come in two main types: fixed and variable. Fixed ND filters have a set light reduction, while variable ND filters allow you to adjust the strength by rotating the filter. Variable ND filters offer flexibility but can sometimes introduce artifacts like cross-polarization.
How to Use an ND Filter
1. Attach the Filter: Screw the ND filter onto the front of your lens. Ensure it is securely attached to avoid any light leaks.
2. Compose Your Shot: Before attaching the filter, compose your shot and focus. ND filters, especially strong ones, can make it difficult to see through the viewfinder or on the screen. Once you have composed and focused, switch to manual focus to prevent the camera from refocusing.
3. Adjust Exposure Settings: With the ND filter in place, you will need to adjust your exposure settings. Depending on the strength of the filter, you may need to increase the shutter speed, open the aperture, or raise the ISO. Use your camera’s exposure meter to guide you.
4. Use a Tripod: For long exposures, a tripod is essential to keep the camera steady and avoid any blur from camera shake. A remote shutter release or the camera’s self-timer function can also help minimize shake.
5. Check the Histogram: After taking a shot, review the histogram to ensure proper exposure. The histogram should not be too skewed to the left (underexposed) or right (overexposed). Adjust your settings as needed.
Practical Tips for Using ND Filters
1. Stacking Filters: If you need more light reduction than a single filter can provide, you can stack multiple ND filters. However, be cautious of vignetting and potential image degradation.
2. Avoiding Color Cast: Some ND filters can introduce a color cast to your images. To correct this, shoot in RAW format and adjust the white balance during post-processing.
3. Cleaning the Filter: Keep your ND filters clean to avoid any smudges or dust spots on your images. Use a microfiber cloth and lens cleaning solution to maintain them.
4. Experiment with Different Strengths: Different scenes and lighting conditions may require different ND filter strengths. Experiment with various filters to understand their effects and find the best one for your needs.
5. Bracketing Exposures: When using strong ND filters, it can be challenging to get the exposure right on the first try. Bracket your exposures by taking multiple shots at different settings to ensure you capture the perfect image.
ND filters are powerful tools that can significantly enhance your photography by providing greater control over exposure and creative effects. Whether you are a landscape photographer looking to capture the smooth flow of water or a portrait photographer aiming for a shallow depth of field in bright light, ND filters can help you achieve your vision. By understanding how to choose and use ND filters effectively, you can take your photography to the next level and create stunning images in a variety of lighting conditions.

There are no comments for this blog.