
How To Use Nd Filters On Drone?
Neutral density (ND) filters are an essential tool for drone photographers and videographers who want to achieve professional-quality results in their aerial shots. These filters help manage light and exposure, allowing for smoother motion, balanced highlights and shadows, and better control over the final appearance of your footage or photos. In this article, we’ll dive deep into how ND filters work, why they are critical for drone shooting, how to choose the right one, and how to use them effectively to take your aerial filmmaking or photography to the next level.
Understanding ND Filters and Their Purpose for Drone Cameras
ND filters are commonly referred to as "sunglasses for your camera." They are optical filters that reduce the amount of light entering your drone's camera lens, without altering the color of your image. By limiting the light, ND filters enable more control over exposure settings, especially in bright conditions such as sunlight reflecting off water, snow, or buildings.
When capturing images or videos with drones, maintaining proper shutter speed and motion blur is critical to achieving cinematic results. ND filters facilitate this by addressing common challenges such as:
1. Overexposure: In daylight conditions, the camera sensor may be overwhelmed by light, resulting in overly bright and washed-out footage. ND filters reduce light to prevent overexposure.
2. Motion Blur: For video, proper motion blur creates a smoother flow of movement in footage, which is usually achieved by using slower shutter speeds. ND filters allow slower speeds while avoiding overexposure.
3. Creative Control: ND filters give you flexibility to manipulate lighting conditions, enabling balanced and artistic compositions.
In short, ND filters help you achieve better exposure control under challenging lighting conditions, unlocking the creative potential of drone photography and videography.
Key Benefits of Using ND Filters on Drones

Before we get into the technical aspects and application of ND filters, here are the main benefits of using them:
Avoiding Overexposed Highlights: Without ND filters, bright sunlight can cause sections of your image to lose detail. ND filters tone down brightness, preserving texture and information in highlights.
Achieving Cinematic Motion Blur: If you're shooting at 24 or 30 frames per second (fps) for video, ND filters allow you to follow the 180-degree shutter rule (for cinematic blur, shutter speed = 2x fps). For example, shooting at 24 fps requires a shutter speed of 1/48, which would not be possible in bright sunlight without an ND filter.
Enhancing Image Quality: ND filters balance exposure across the entire frame, providing a richer, more dynamic appearance in your photos or videos.
Improving Creativity and Versatility: Whether you’re trying to highlight swift movement or capture vibrant landscapes, ND filters enable greater experimentation with light settings.
How to Choose the Right ND Filter for Your Drone
ND filters come in varying intensities, typically denoted by numbers such as ND4, ND8, ND16, ND32, and so on. These numbers represent how much light is reduced as it passes through the filter. For example:
ND4: Reduces light by 2 stops (dimmed 75%).
ND8: Reduces light by 3 stops (dimmed 87.5%).
ND16: Reduces light by 4 stops (dimmed 93.75%).
ND32: Reduces light by 5 stops (dimmed 96.875%).
When deciding which ND filter to use, you’ll need to consider factors like the strength of sunlight, shooting location, time of day, and specific filmmaking goals. Here's a quick guide:
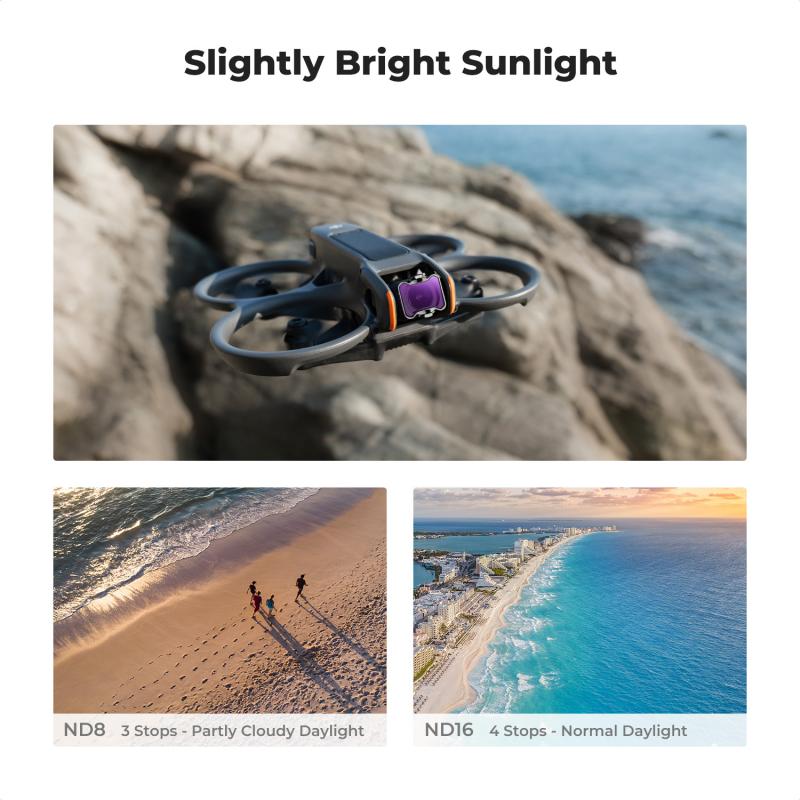
1. Bright Sunny Days: ND16 or ND32 is ideal for minimizing harsh sun and maintaining detail in highlights and shadows.
2. Partly Cloudy Conditions: ND8 normally works well in these softer light conditions.
3. Early Morning or Late Afternoon: ND4 is suitable for balanced light, preventing a subtle overexposure while maintaining smoothness in motion.
If you’re unsure, many ND filter kits come with multiple filters so you can easily switch depending on the environment.
Step-by-Step Guide to Using ND Filters on Your Drone
Now that you understand the purpose and benefits of ND filters, here’s a step-by-step guide to using them on your drone to achieve outstanding results:
1. Choose the Right ND Filter
Before your flight, assess the lighting conditions and select the correct ND filter. If you’re shooting during midday with strong sunlight, start with ND16 or ND32 and adjust if necessary.
2. Attach the ND Filter Carefully
Most drones with cameras (like DJI drones) are compatible with detachable ND filters. Simply remove the stock lens cover and replace it with the ND filter. Make sure the filter is securely attached to avoid vibrations or uneven footage during flight.
3. Manually Adjust Camera Settings
Once the ND filter reduces light entering the camera, manually adjust your settings to achieve desired results. For cinematic video:
- Follow the 180-degree shutter rule (shutter speed = 2x frame rate). For instance, shooting at 30 fps requires a shutter speed of 1/60.
- Set ISO as low as possible (e.g., ISO 100) to minimize noise and maintain crisp image quality.
For photos:
- Use a slow shutter speed for capturing motion blur (e.g., waterfalls or moving crowds).
- Take advantage of longer exposures and balanced focus in bright light.
4. Conduct Test Shots
Take a few test shots or brief video clips before fully committing to your shoot. This will help you assess exposure, motion blur, and overall effect. Adjust ND filters and settings accordingly.
5. Monitor Results During Flight
While flying, monitor your live feed to ensure proper exposure and stabilization. Be vigilant for unexpected glare or excessive dimming and adjust filters if needed.
6. Post-Processing
ND filters help you capture balanced visuals, but the full creative potential often comes to life during post-processing. Use software like Adobe Lightroom or Premiere Pro to enhance contrast, adjust tones, and fine-tune details.
Additional Tips for Using ND Filters on Drones
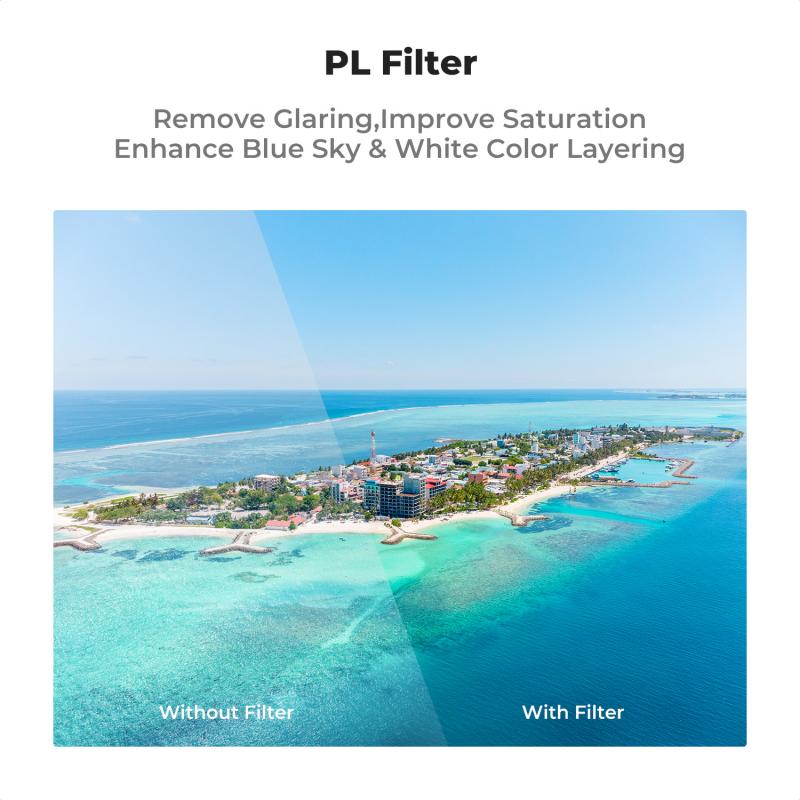
1. Combine ND and Polarizing Filters: Some ND filters also function as polarizing filters, which help reduce glare from reflective surfaces like water or glass and enhance color saturation. These combo filters are ideal for landscape shooting.
2. Experiment with Composition: With ND filters, you have more flexibility to try creative compositions such as long exposures of moving objects or balanced foreground-background shots.
3. Understand Limitations: While ND filters are excellent for exposure control, they won’t fix underlying issues like poor focus or unsteady camera movement. Always ensure your drone camera is appropriately calibrated.
4. Carry Multiple Filters: Weather and light conditions can shift unexpectedly during an outdoor shoot. Bringing a small kit of ND filters allows you to adapt quickly.
5. Practice Proper Maintenance: Clean your ND filters regularly with a soft cloth to prevent dust or smudges. Poor maintenance can degrade image quality.
Common Scenarios Where ND Filters Are Essential
Knowing when to use ND filters is as important as knowing how to use them. Here are a few key scenarios where ND filters can be game-changers:
1. High-Altitude Shoots: Bright sunlight at higher altitudes often causes overexposure. ND filters help tone down excessive brightness.
2. Action Footage: Filming fast-moving subjects like boats or vehicles benefits from smoother motion blur, which ND filters enable.
3. Water Surfaces: ND filters reduce glare that often compromises detail in water-based scenes.
4. Landscape Photography: Balanced exposure and dynamic range are critical for capturing vibrant landscapes, making ND filters invaluable.
ND filters are an indispensable accessory for any drone photographer or filmmaker looking to elevate their craft. They provide the tools needed to manage light, reduce overexposure, and achieve cinematic results in both photos and videos. Whether you’re capturing sprawling landscapes or fast-paced action sequences, understanding and applying ND filters correctly will ensure your footage stands out.
By taking time to choose the right ND filter, experimenting with compositions, and refining your settings, you can masterfully control light and bring your vision to life, even in challenging shooting environments. So, invest in a quality set of
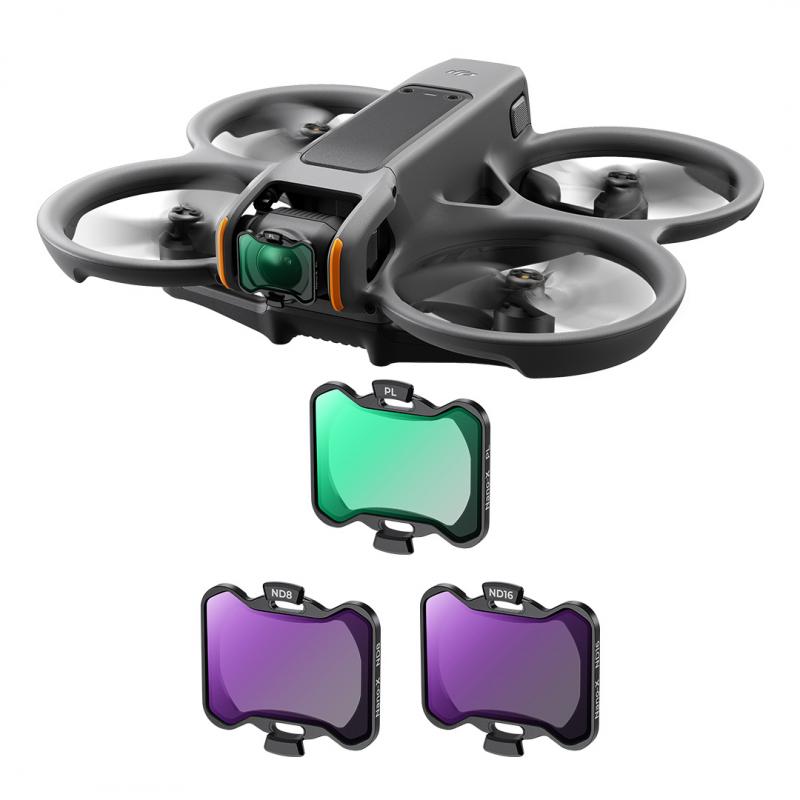
 4 Pack Compatible with DJI Avata 2, Multi-coated Neutral Density Drone Filters")

")
 3 Pack Compatible with DJI Avata 2, Multi-coated Neutral Polarizer Density Drone Lens Filters")

 ND8 ND16 ND32 ND64 Snap On Multi-Coated HD Optical Glass Neutral Density Drone Camera Lens Filter Accessories")
 6 Pack Compatible with DJI Avata 2, Drone Accesorries with 28 Multi-Layer Coated")
 Neutral Density Polarizer Filter Drone Camera Lens Accessories, Multi-Coated Top Optical Glass Light Reduction Polarizer Filter")


 Camera Adapter with Matting Varnish for Olympus Pen E-P1 P2 P3 P5 E-PL1 Panasonic Lumix GH1 2 3")


 ( One flash sale item per customer )")


