
How To Record Wireless Security Camera?
Recording a wireless security camera involves setting up your system properly, understanding the features of your camera, and choosing a recording method that best meets your needs. With the increasing adoption of smart home technologies, wireless security cameras have become a popular solution for home and business surveillance. In this comprehensive guide, we’ll explain the steps you need to take to successfully record footage from a wireless security camera, address common user queries, and provide solutions to ensure a smooth recording experience.
1. Understanding Your Wireless Security Camera

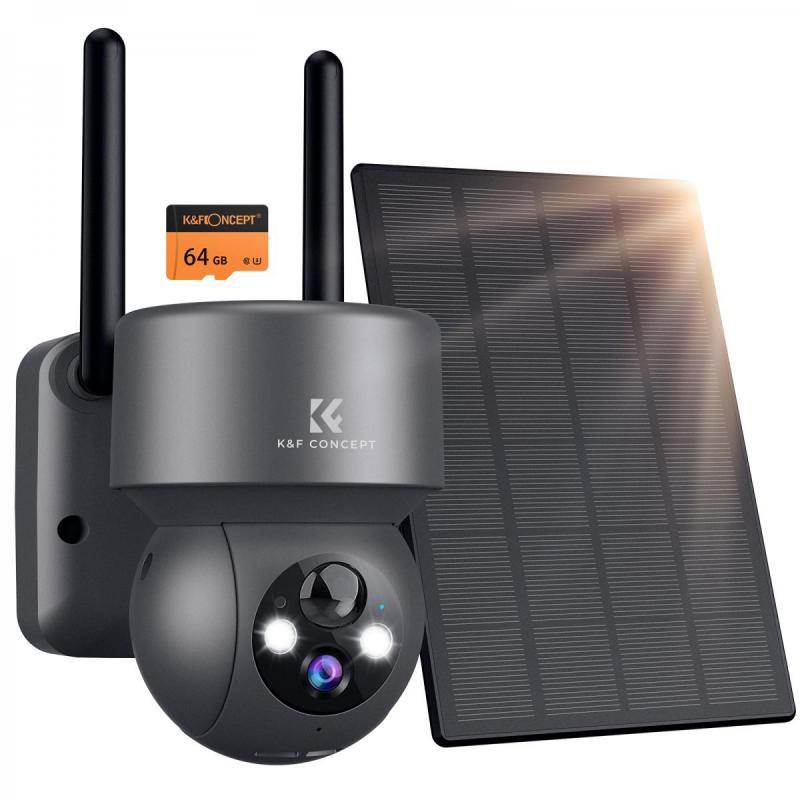
Wireless security cameras transmit video signals wirelessly to a connected hub or device such as a smartphone, computer, or cloud service, rather than through traditional wired methods. However, power delivery might still require wires unless the camera is battery-operated. Before setting up the recording process, examine your camera's key features such as resolution, frame rate, storage capabilities, and compatibility with external devices.
Some essential specifications to check include:
Video Quality: Ensure the quality (e.g., 720p, 1080p, or 4K) suits your security needs.
Internal vs. External Storage: Determine if the camera has a memory card slot or requires cloud storage subscription services.
Power Supply: Understand whether the camera is battery-powered, solar-powered, or requires an electrical outlet.
Wi-Fi Connectivity: Confirm the strength and compatibility of your Wi-Fi network to avoid interruptions.
2. Choose the Right Type of Recording
There are three primary methods of recording footage from a wireless security camera:
Local Storage: Recorded videos are saved locally to a microSD card or an external hard drive.
Cloud Storage: Footage is uploaded to an internet-based storage service, often requiring a subscription.
NVR/DVR Integration: Network Video Recorders (NVRs) or Digital Video Recorders (DVRs) can also store footage from certain wireless cameras.
Each method has its pros and cons:
Local Storage: No recurring costs, but storage is limited to the capacity of the card or device.
Cloud Storage: Offers remote access and unlimited storage (depending on the plan), but involves a recurring fee and requires internet reliability.
NVR/DVR Integration: Ideal for advanced setups, though it may be more complex to configure.
3. Setting Up Your Wireless Security Camera
Follow these steps to correctly set up your camera and begin recording:
Step 1: Power Your Camera
- If your camera is battery-powered, ensure the battery is fully charged.
- For wired devices, plug them into an electrical outlet.
Step 2: Connect Camera to Wi-Fi
- Use the manufacturer’s mobile app or web interface to connect the camera to your home or office Wi-Fi network. Ensure that the camera is within range of the router to maintain a stable connection.
Step 3: Install the Camera
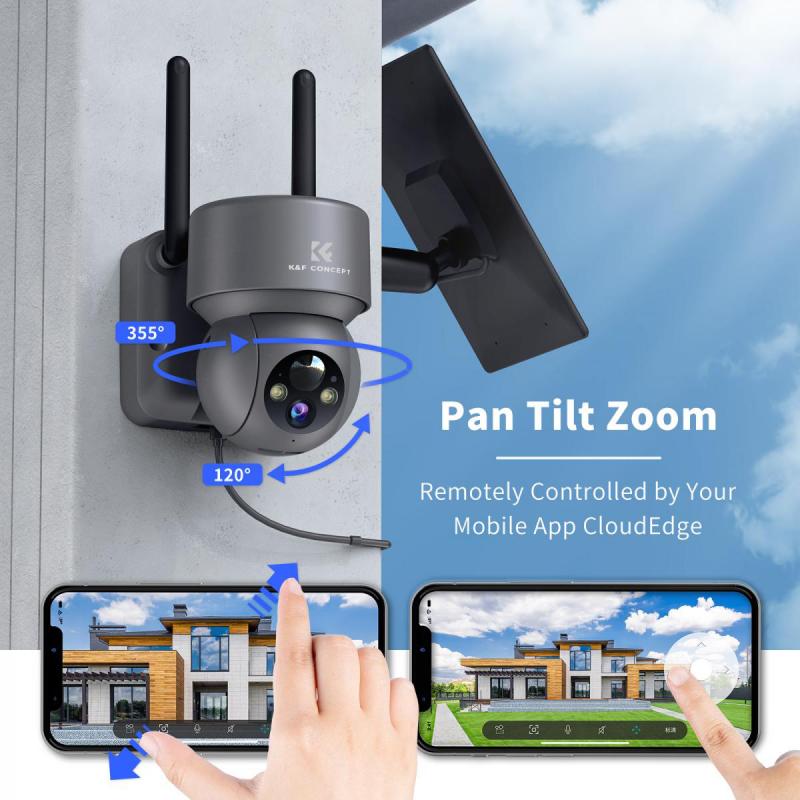
- Choose a strategic location for the camera to monitor areas of interest (e.g., entry points, driveways, or indoor spaces). For outdoor cameras, consider weatherproofing measures and a secure installation to prevent tampering.
Step 4: Configure Camera Settings
- Customize key settings through the app, such as motion detection, resolution, and recording schedules. You can also enable notifications for real-time alerts.
4. Configuring the Recording Function

Wireless security cameras provide various mechanisms for recording footage, depending on the camera type and brand.
Option 1: Using Local Storage
1. Insert a MicroSD Card: Many cameras have a slot for local storage. Insert the card beforehand and ensure it’s formatted according to compatibility guidelines.
2. Setup Automatic Recording: In the camera's mobile app or web portal, enable continuous recording or event-based recording triggered by motion or sound.
3. Accessing Footage: Recorded videos will be stored on the card, which can be accessed by removing the card and connecting it to a computer.
Option 2: Using Cloud Storage
1. Activate a Cloud Service Plan: Select a subscription plan from your camera provider. Most plans offer incremental tiers based on storage duration (e.g., 7 days, 30 days).
2. Enable Cloud Recording: Use the app to turn on automatic cloud uploads for continuous or event-based recording.
3. Manage Footage: Access your recordings via a secure portal or app. You can download or share clips as needed.
Option 3: Using an NVR/DVR
1. Connect to the Recorder: If your camera supports integration with an NVR/DVR, connect it wirelessly to the recorder.
2. Configure Storage Options: Ensure the NVR/DVR has sufficient storage space, as recordings are saved directly to the device.
3. Accessing Footage: Use the recorder’s software for playback and retrieval of video files.
5. Troubleshooting Common Problems
Encountering issues during your setup or recording process is not uncommon, but most can be resolved with simple adjustments:
Issue 1: Weak Wi-Fi Signal
Solution: Position your camera closer to the router or invest in a Wi-Fi extender to improve coverage.
Issue 2: Storage Limitations
Solution: Upgrade your microSD card, purchase additional cloud storage, or set your camera to overwrite old footage automatically.
Issue 3: Camera Not Recording
Solution: Ensure motion detection or recording settings are enabled, check your power connection, and confirm that the camera firmware is up-to-date.
Issue 4: Playback Issues
Solution: Verify file formats and compatibility with the playback device. If using a cloud service, ensure your internet connection is functional.
6. Maximizing the Effectiveness of Your System
To get the most value from your security camera’s recording capabilities, consider the following tips:
Optimize Recording Duration: Customize recording times to avoid unnecessary footage. For example, set the camera to record only during specific hours or when motion is detected.
Positioning for Coverage: Avoid placing cameras against light sources like windows, which might cause glare or overexposure. Test multiple angles to determine the best line of sight.
Regular Maintenance: Check your equipment periodically to ensure it’s functioning correctly. Clean lenses, remove debris, and recharge/change batteries as needed.
Data Backup: Regularly download important clips from local or cloud storage to prevent losing evidence during technical failures.
7. Legal Considerations
When using security cameras, it’s essential to remain compliant with local privacy laws:
- Avoid pointing cameras toward neighboring properties.
- Clearly display signage if recording in public areas.
- Understand data retention policies if using cloud services.
8. Frequently Asked Questions
Here are some common questions users face when recording with wireless security cameras:
Q1: Can I record continuously on a wireless camera with battery power?
It depends on the camera model. Most battery-powered devices prioritize motion-triggered recording to conserve power. Continuous recording may require a wired power source.
Q2: Do I need an internet connection for recording?
Local storage options do not require an active internet connection. However, cloud services and remote access features will need reliable Wi-Fi.
Q3: What happens if my SD card is full?
Many cameras offer an overwrite feature, automatically replacing the oldest footage with new recordings.
Q4: Are there alternatives to branded cloud services?
Some cameras are compatible with third-party apps or services (e.g., Google Drive, Dropbox). Check compatibility with your specific camera.
Conclusion
Recording a wireless security camera can be straightforward if you understand your camera’s features and choose the right storage method for your needs. Whether you prefer local storage, cloud-based solutions, or dedicated devices like NVRs, setting up and managing your recordings is key to maintaining a reliable security system. With the guidance provided in this article, you can ensure a robust monitoring setup that meets your surveillance goals. As always, familiarize yourself with your camera’s user manual and software to maximize its potential for safeguarding your home or business.


